Getting Started
Prerequisites
- Docker: Make sure you have Docker installed on your system. If not, you can download it from here and start it once installed.
- Git: You will need Git to clone the repository. You can download it from here.
- Go: Required to generate your environment file. Install from here.
- jq: Useful for optional scripts and diagnostics. You can download it from here
For macOS, Linux, you can install with Homebrew:
brew install --cask docker
brew install git go jq
Clone the repository
git clone https://github.com/stellar/stellar-disbursement-platform-backend.git
cd stellar-disbursement-platform-backend
Run the wizard
make setup
At the prompts, choose according to below. The wizard generates and funds the SEP-10 signer and distribution accounts (testnet), starts Docker, and prints tenant credentials.
? Select an existing run configuration or create new:
▸ Create new configuration
✔ Setup name (optional): <sdp-setup-name>
? Select network:
▸ testnet
? Select tenant mode:
▸ single-tenant
? Account setup:
▸ Generate new accounts
? Launch local environment now (project=sdp-sdp-test, setup=<sdp-setup-name>)? [Y/n] Y
? Initialize tenants and users? [y/N] Y
After completion you should see:
🎉🎉🎉🎉 SUCCESS! 🎉🎉🎉🎉
Single tenant mode - Login URL:
🔗Default tenant: http://localhost:3000
  username: owner@default.local  password: Password123!
Log into the SDP
Open http://localhost:3000 and log in using the admin credentials generated by the setup wizard (organization: default). 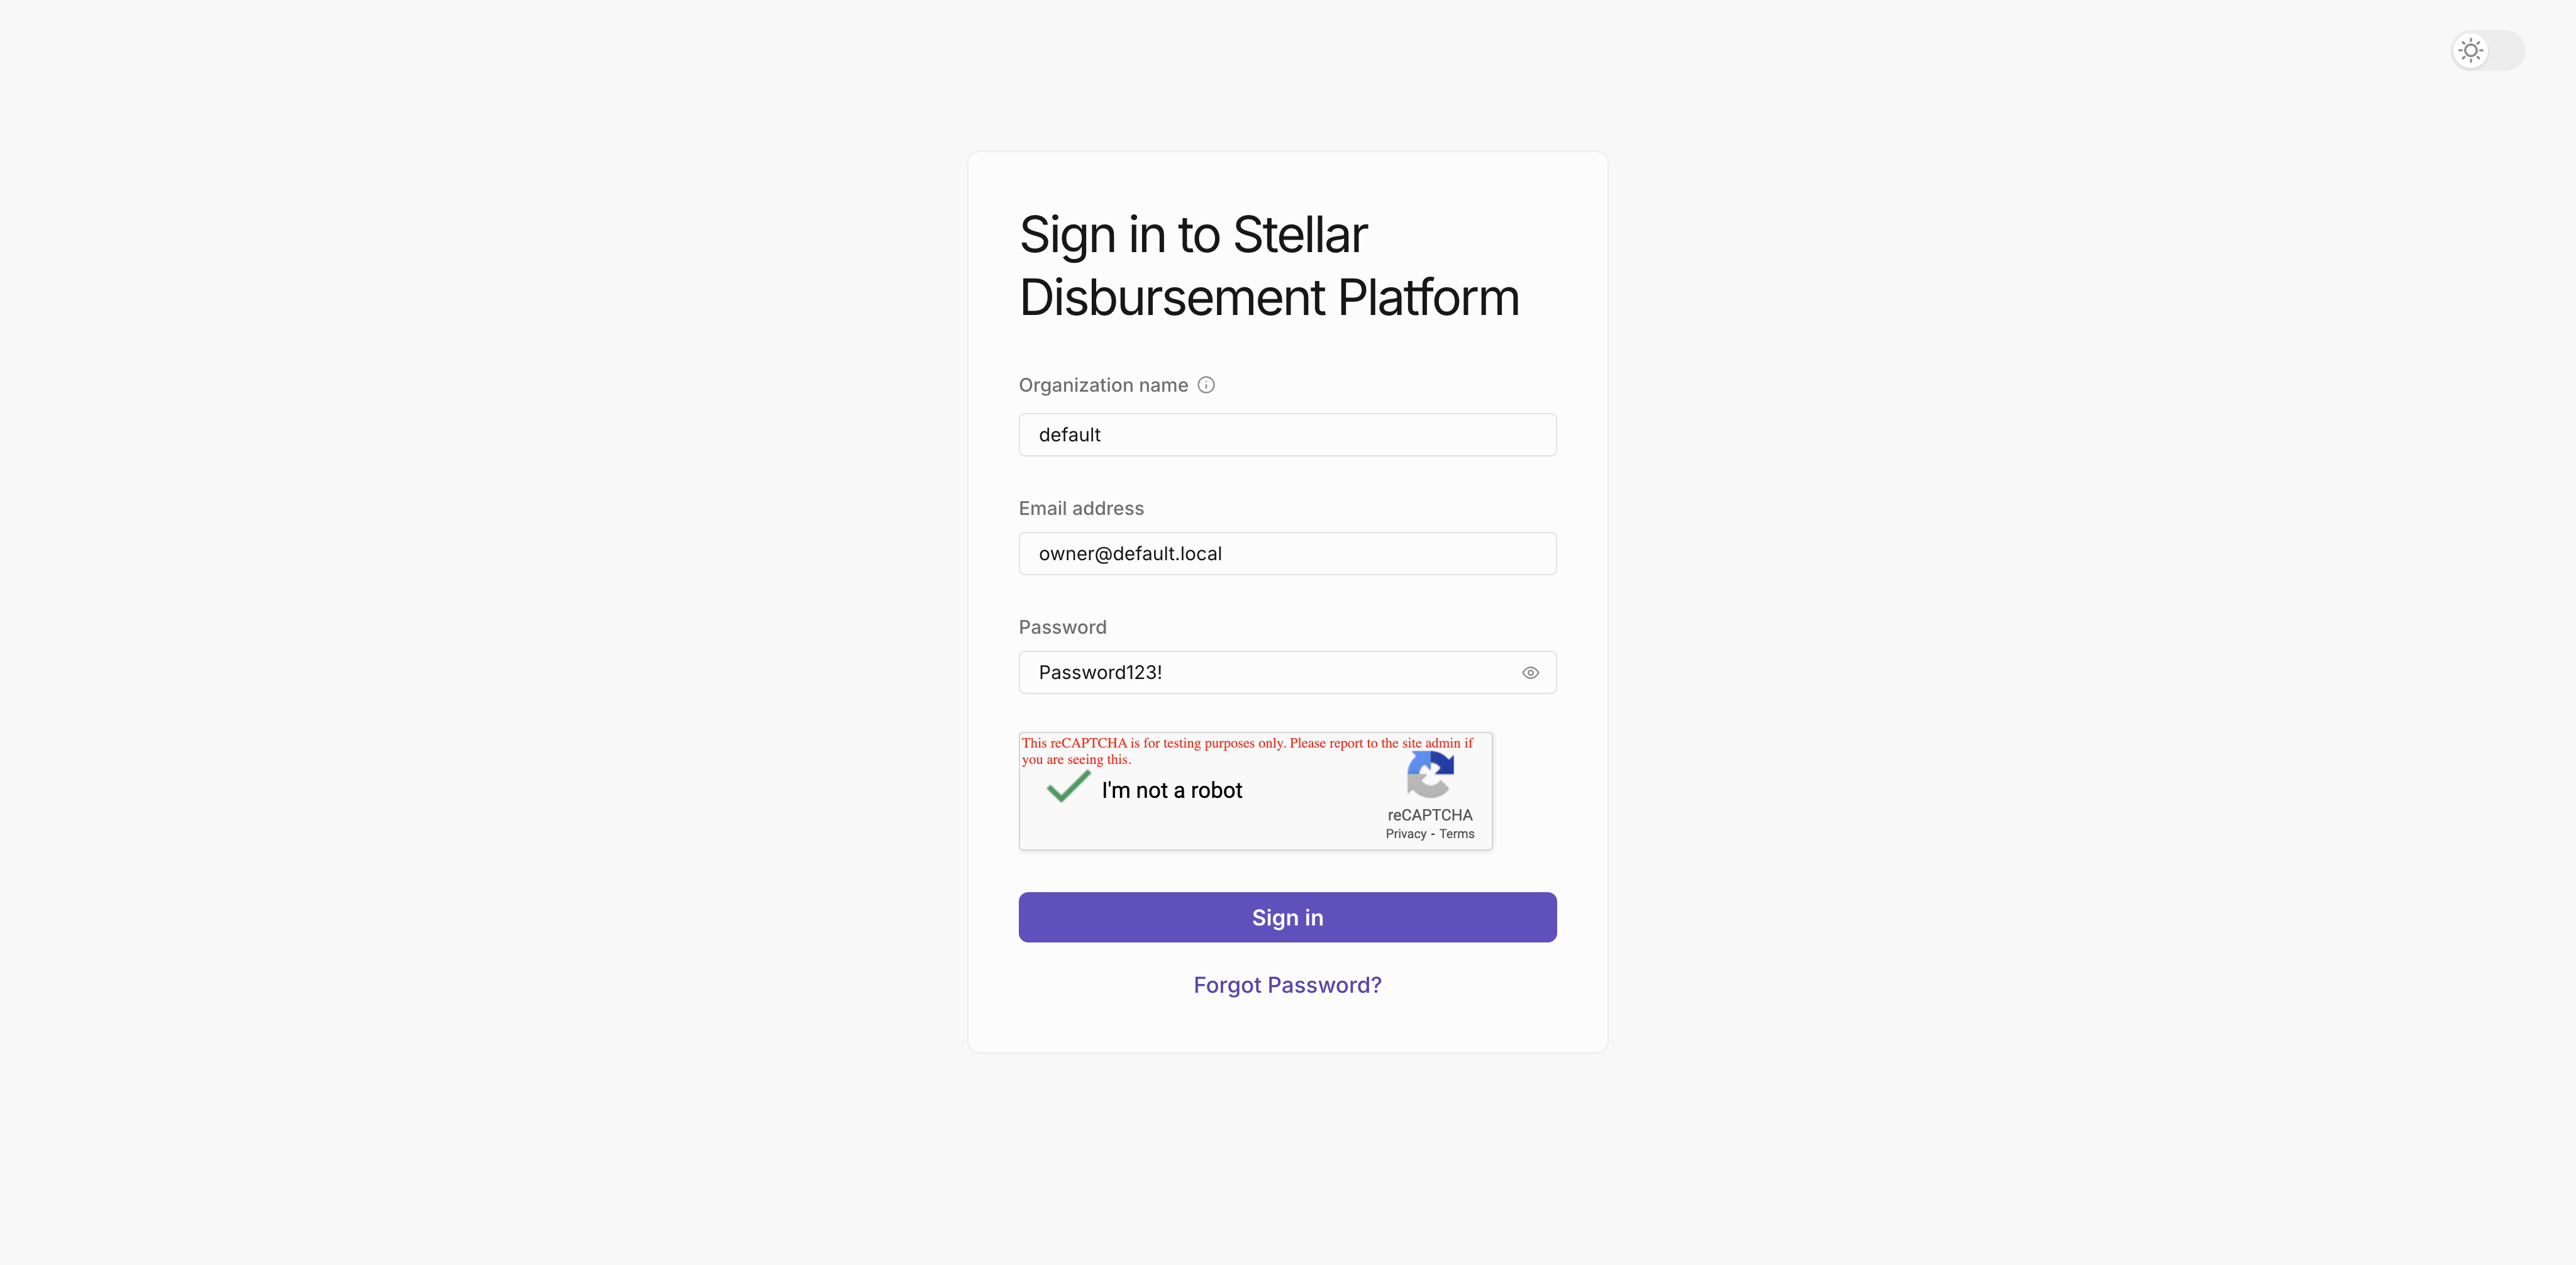
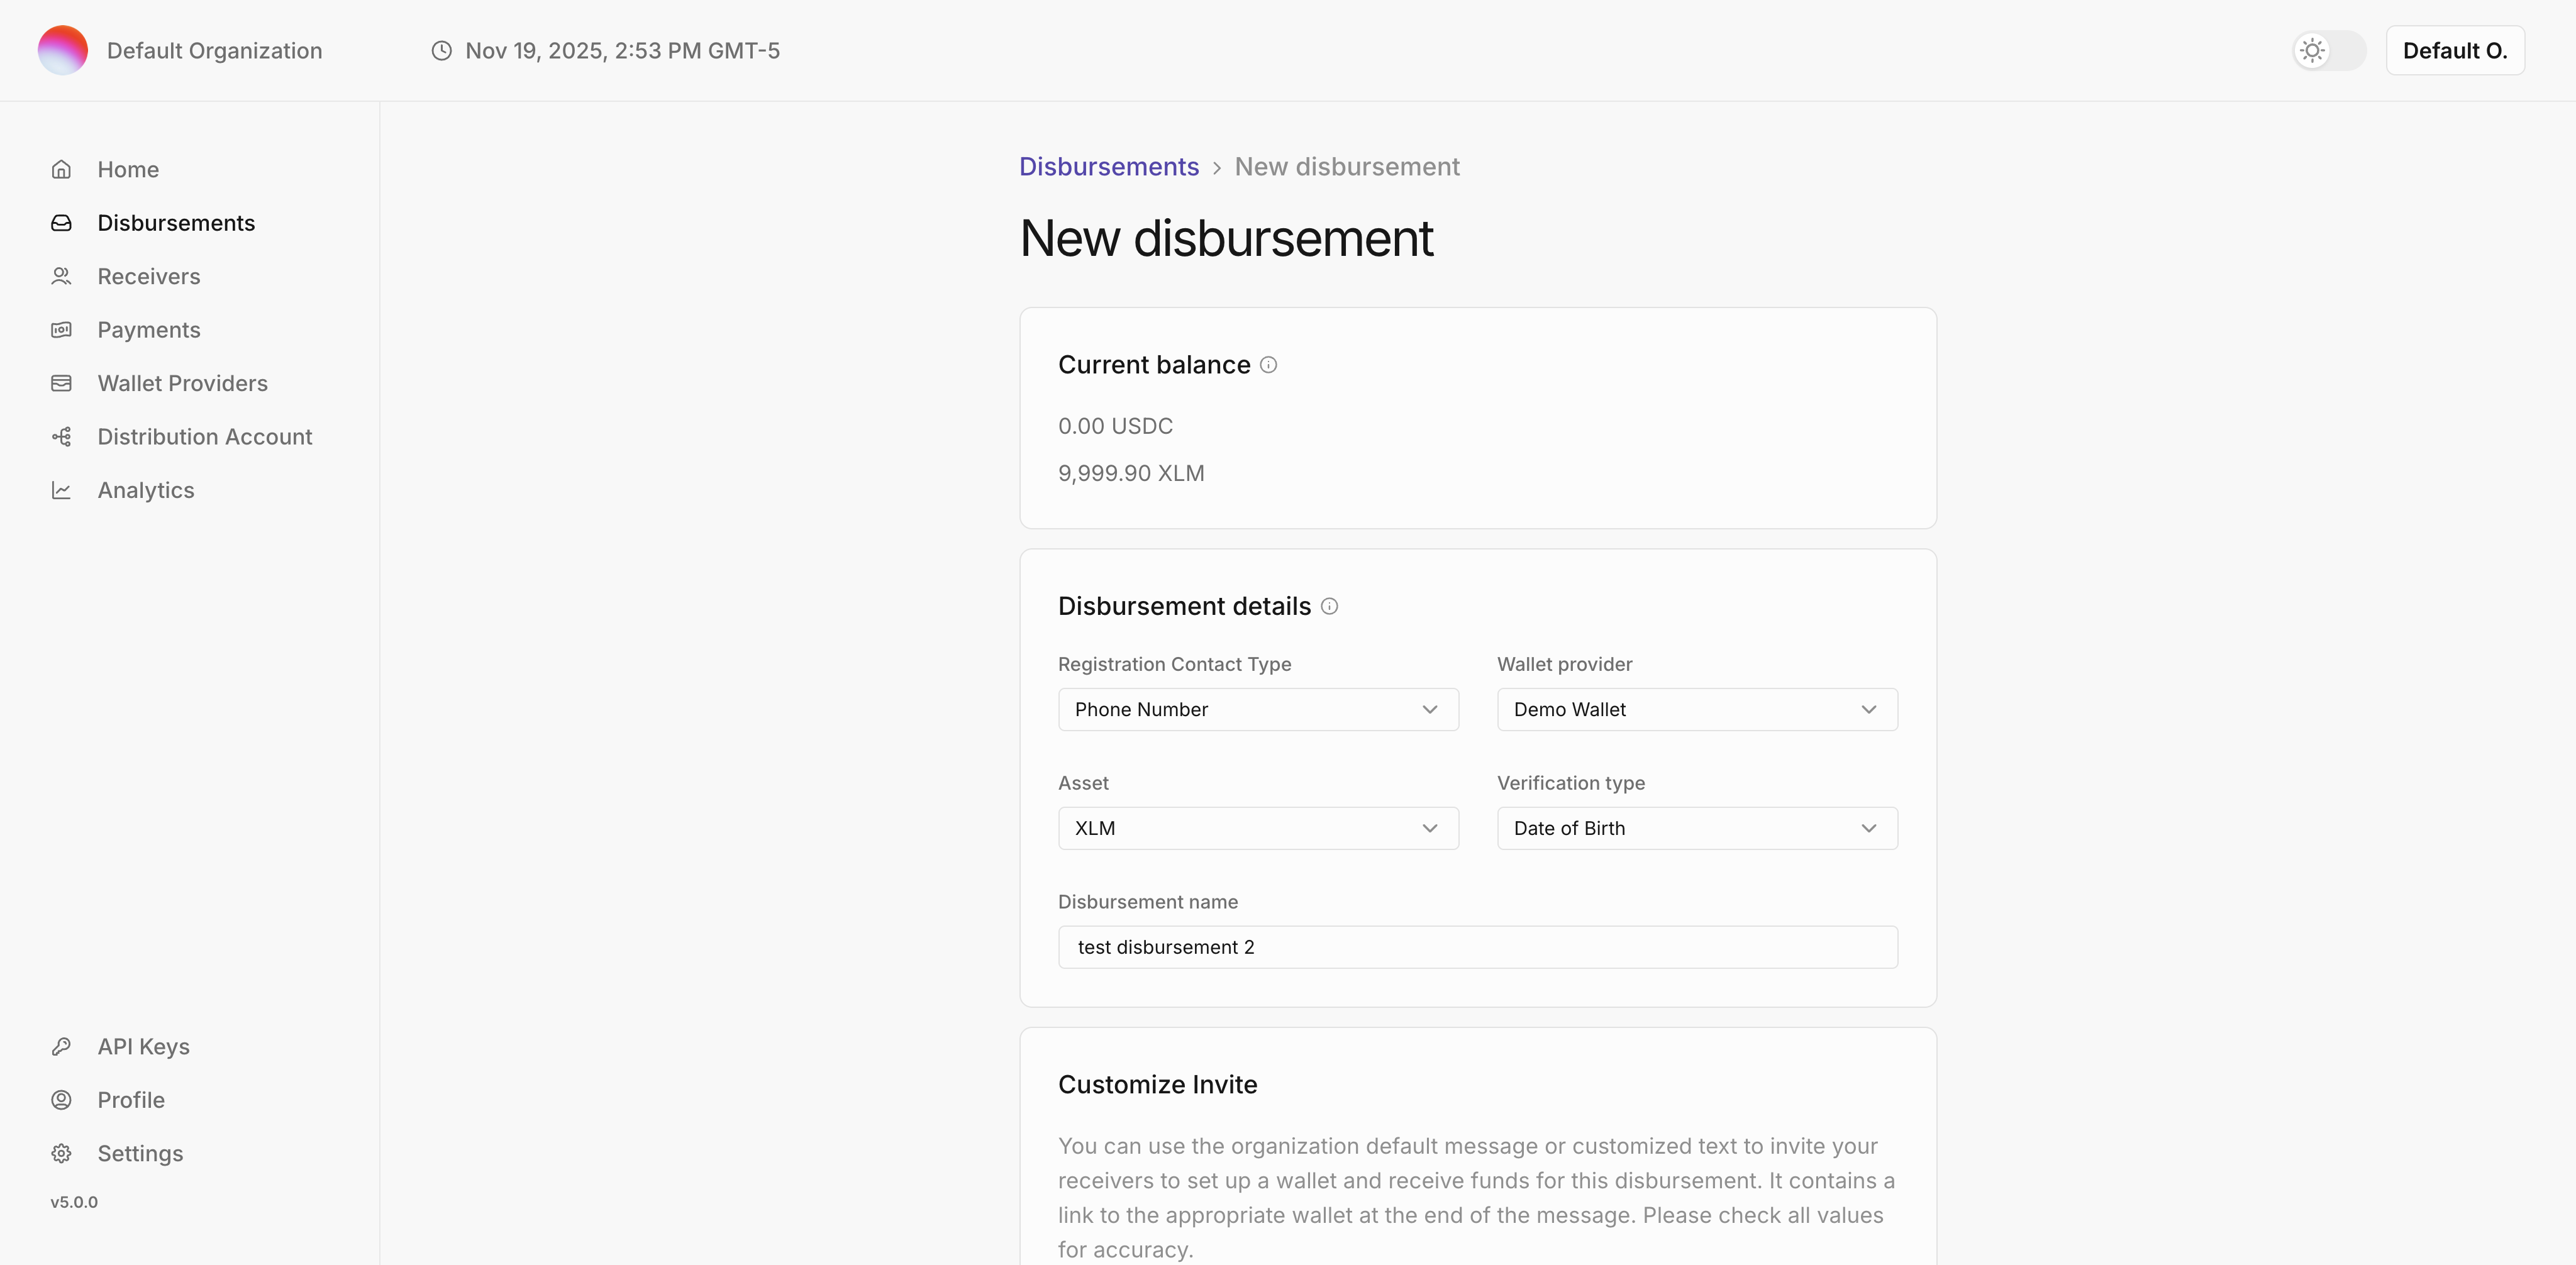
Send a test disbursement
Click New Disbursement + on the dashboard; you’ll see a funded distribution account ready to use:
- Choose a phone number as the Registration Contact Type. This is the channel recipients will use to receive messages.
- Select XLM as the asset to disburse.
- Pick Demo Wallet as the recipient wallet.
- Choose Date of Birth as the verification method; recipients will enter it to confirm their identity.
- Give disbursement a name.
Create and Upload a Disbursement File:
- Download the sample via
Download CSV Template; it includes all required columns. - Update the placeholder/invalid phone numbers before using it.
- The verification column holds the identity data recipients must match.
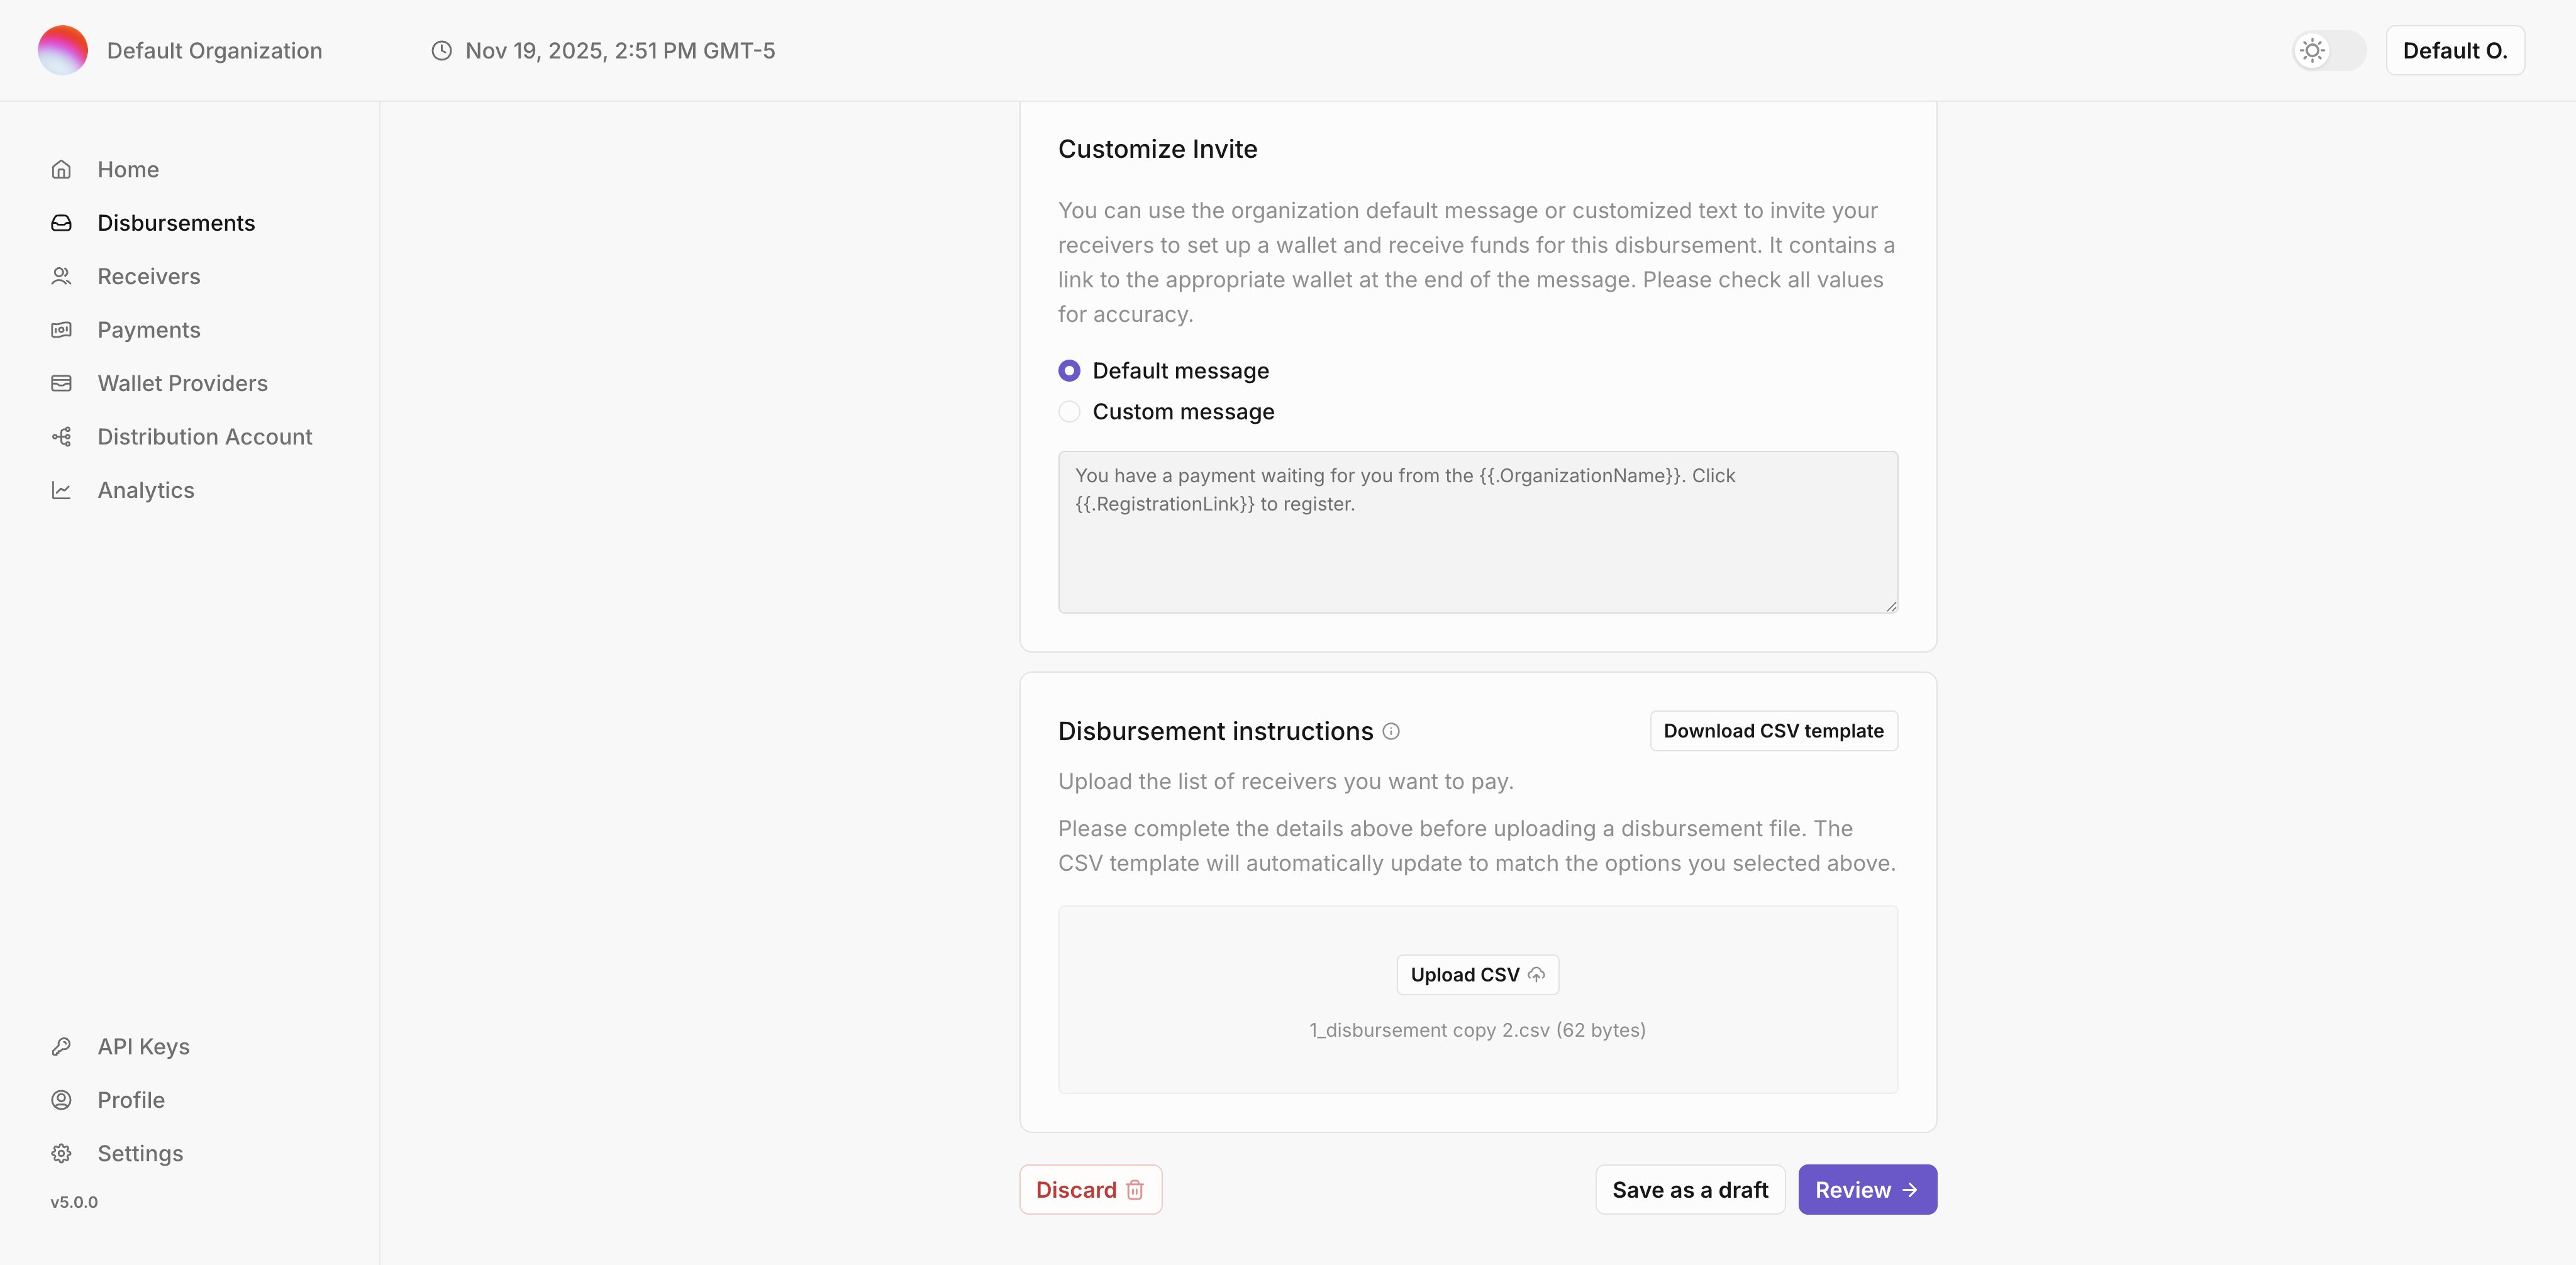
Click the Review button. When you are ready to start the disbursement, click the "Confirm disbursement" button. In Disbursement Details you’ll see the payment in Ready status, meaning the receiver has yet to accept the invitation and deposit the funds. 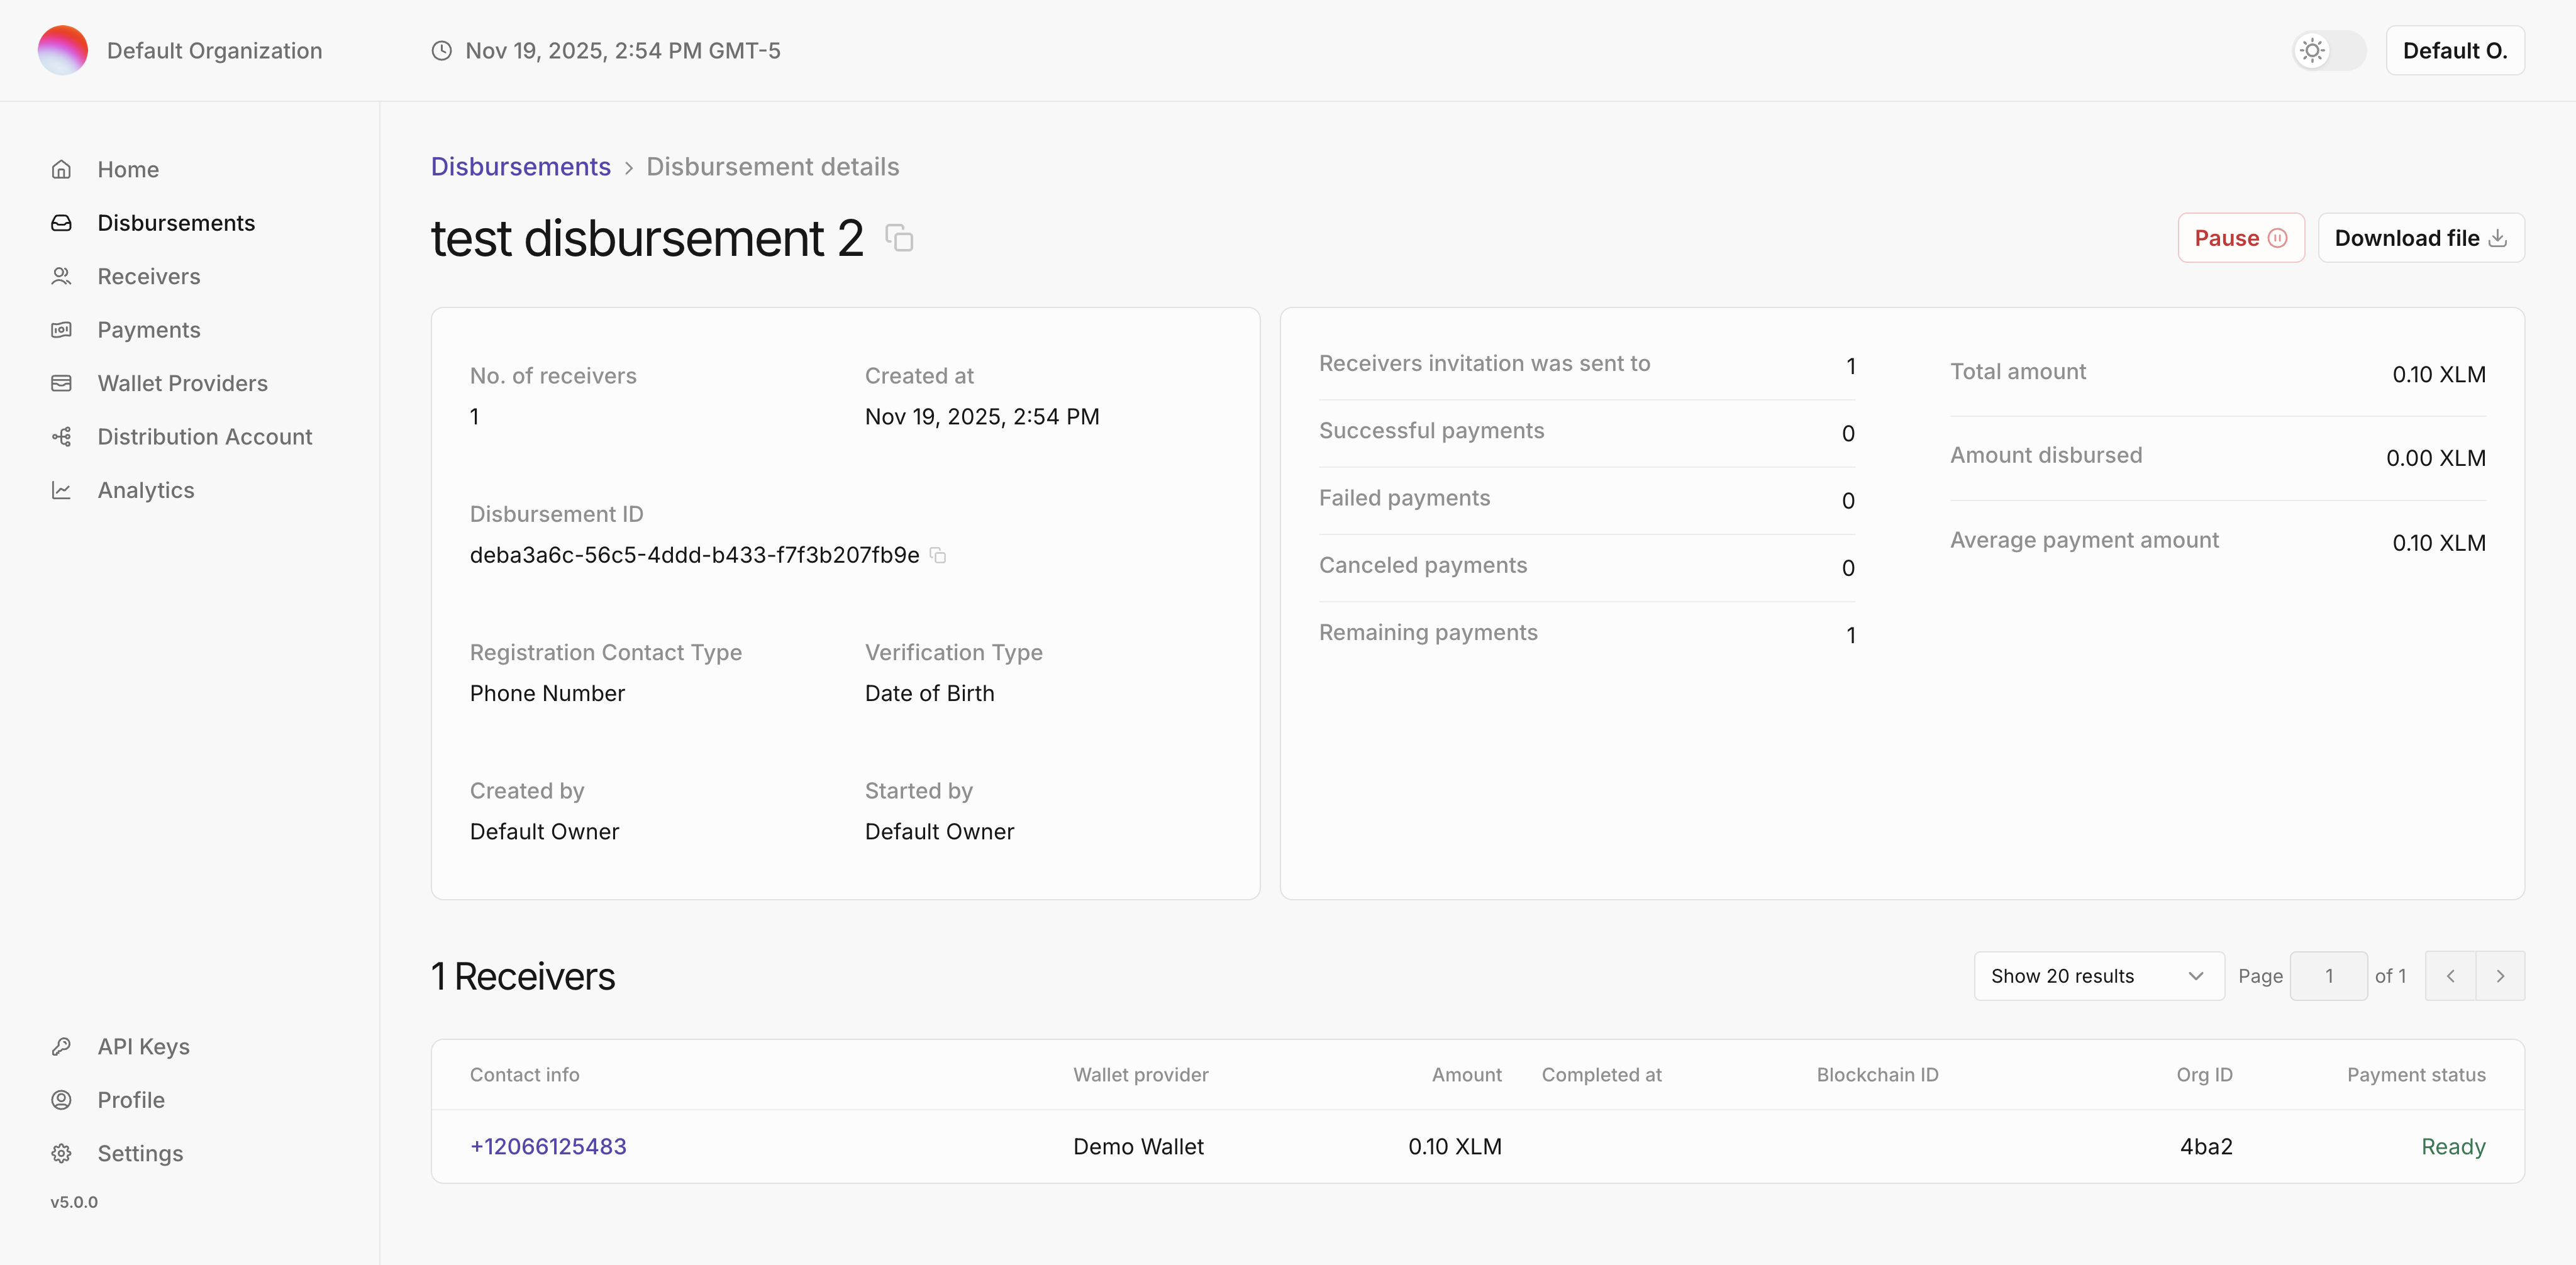
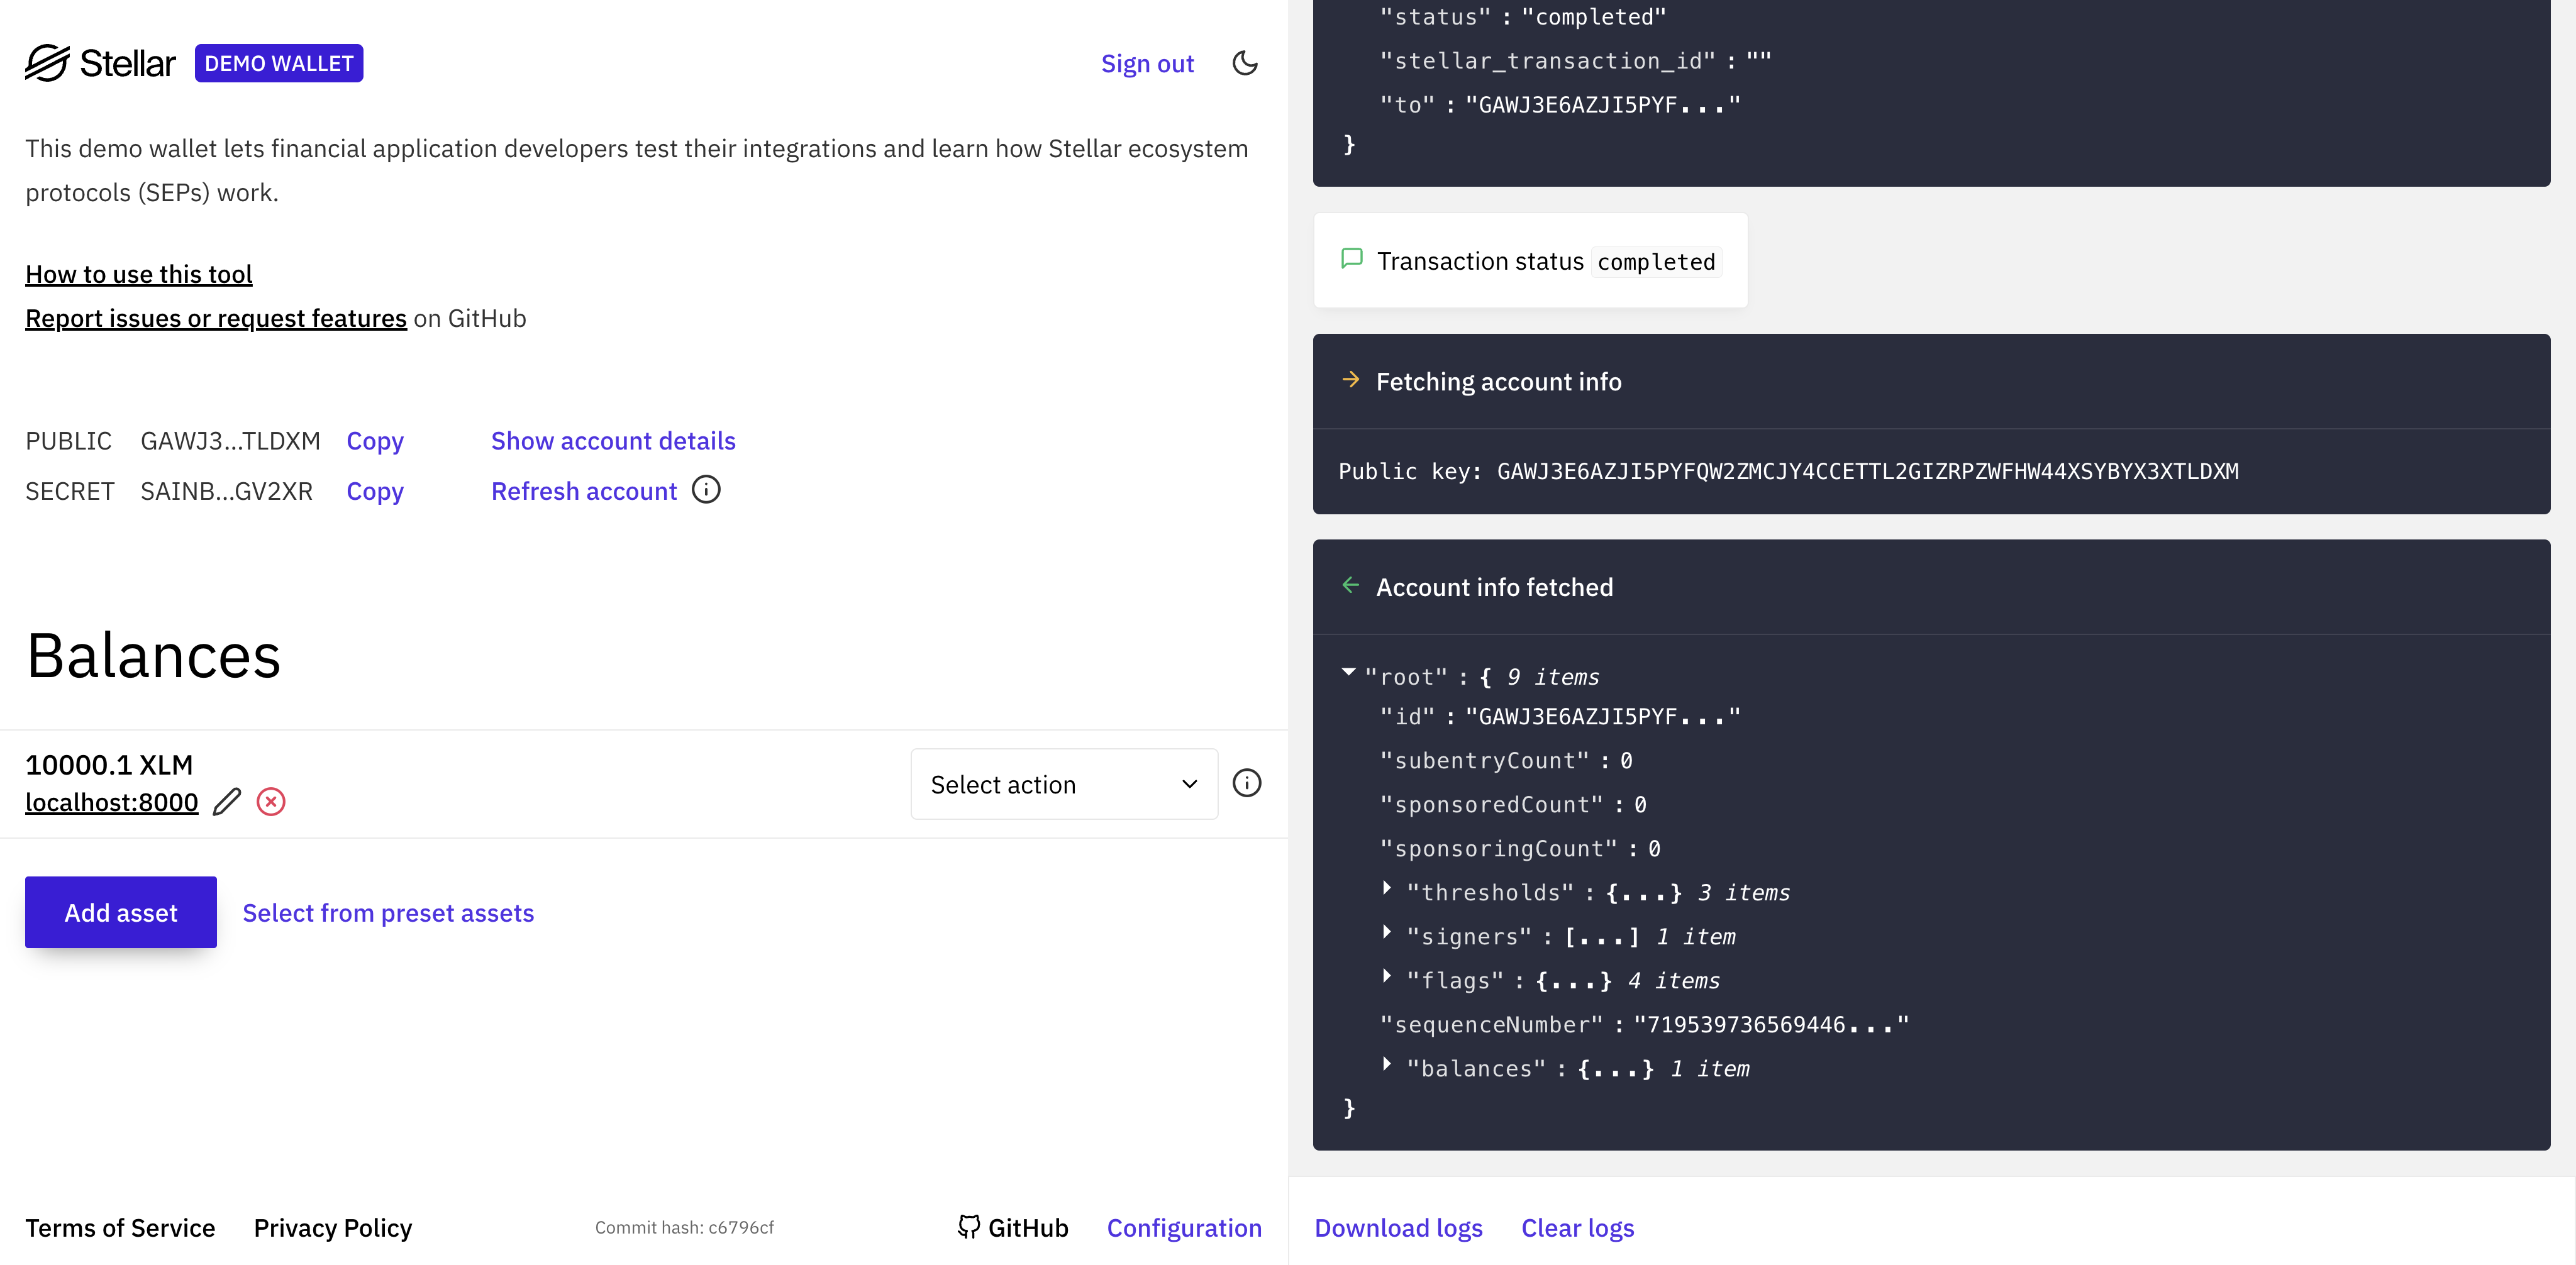
Receive Payment
Claim the payment in the demo wallet by first creating a wallet:
- Open the demo wallet: http://localhost:4000.
- Click
Generate Keypair for new accountto create a keypair; save the public and secret keys if you plan to reuse the account. - Click
Create accountto create the account on the Stellar testnet (the account starts with 10,000 XLM).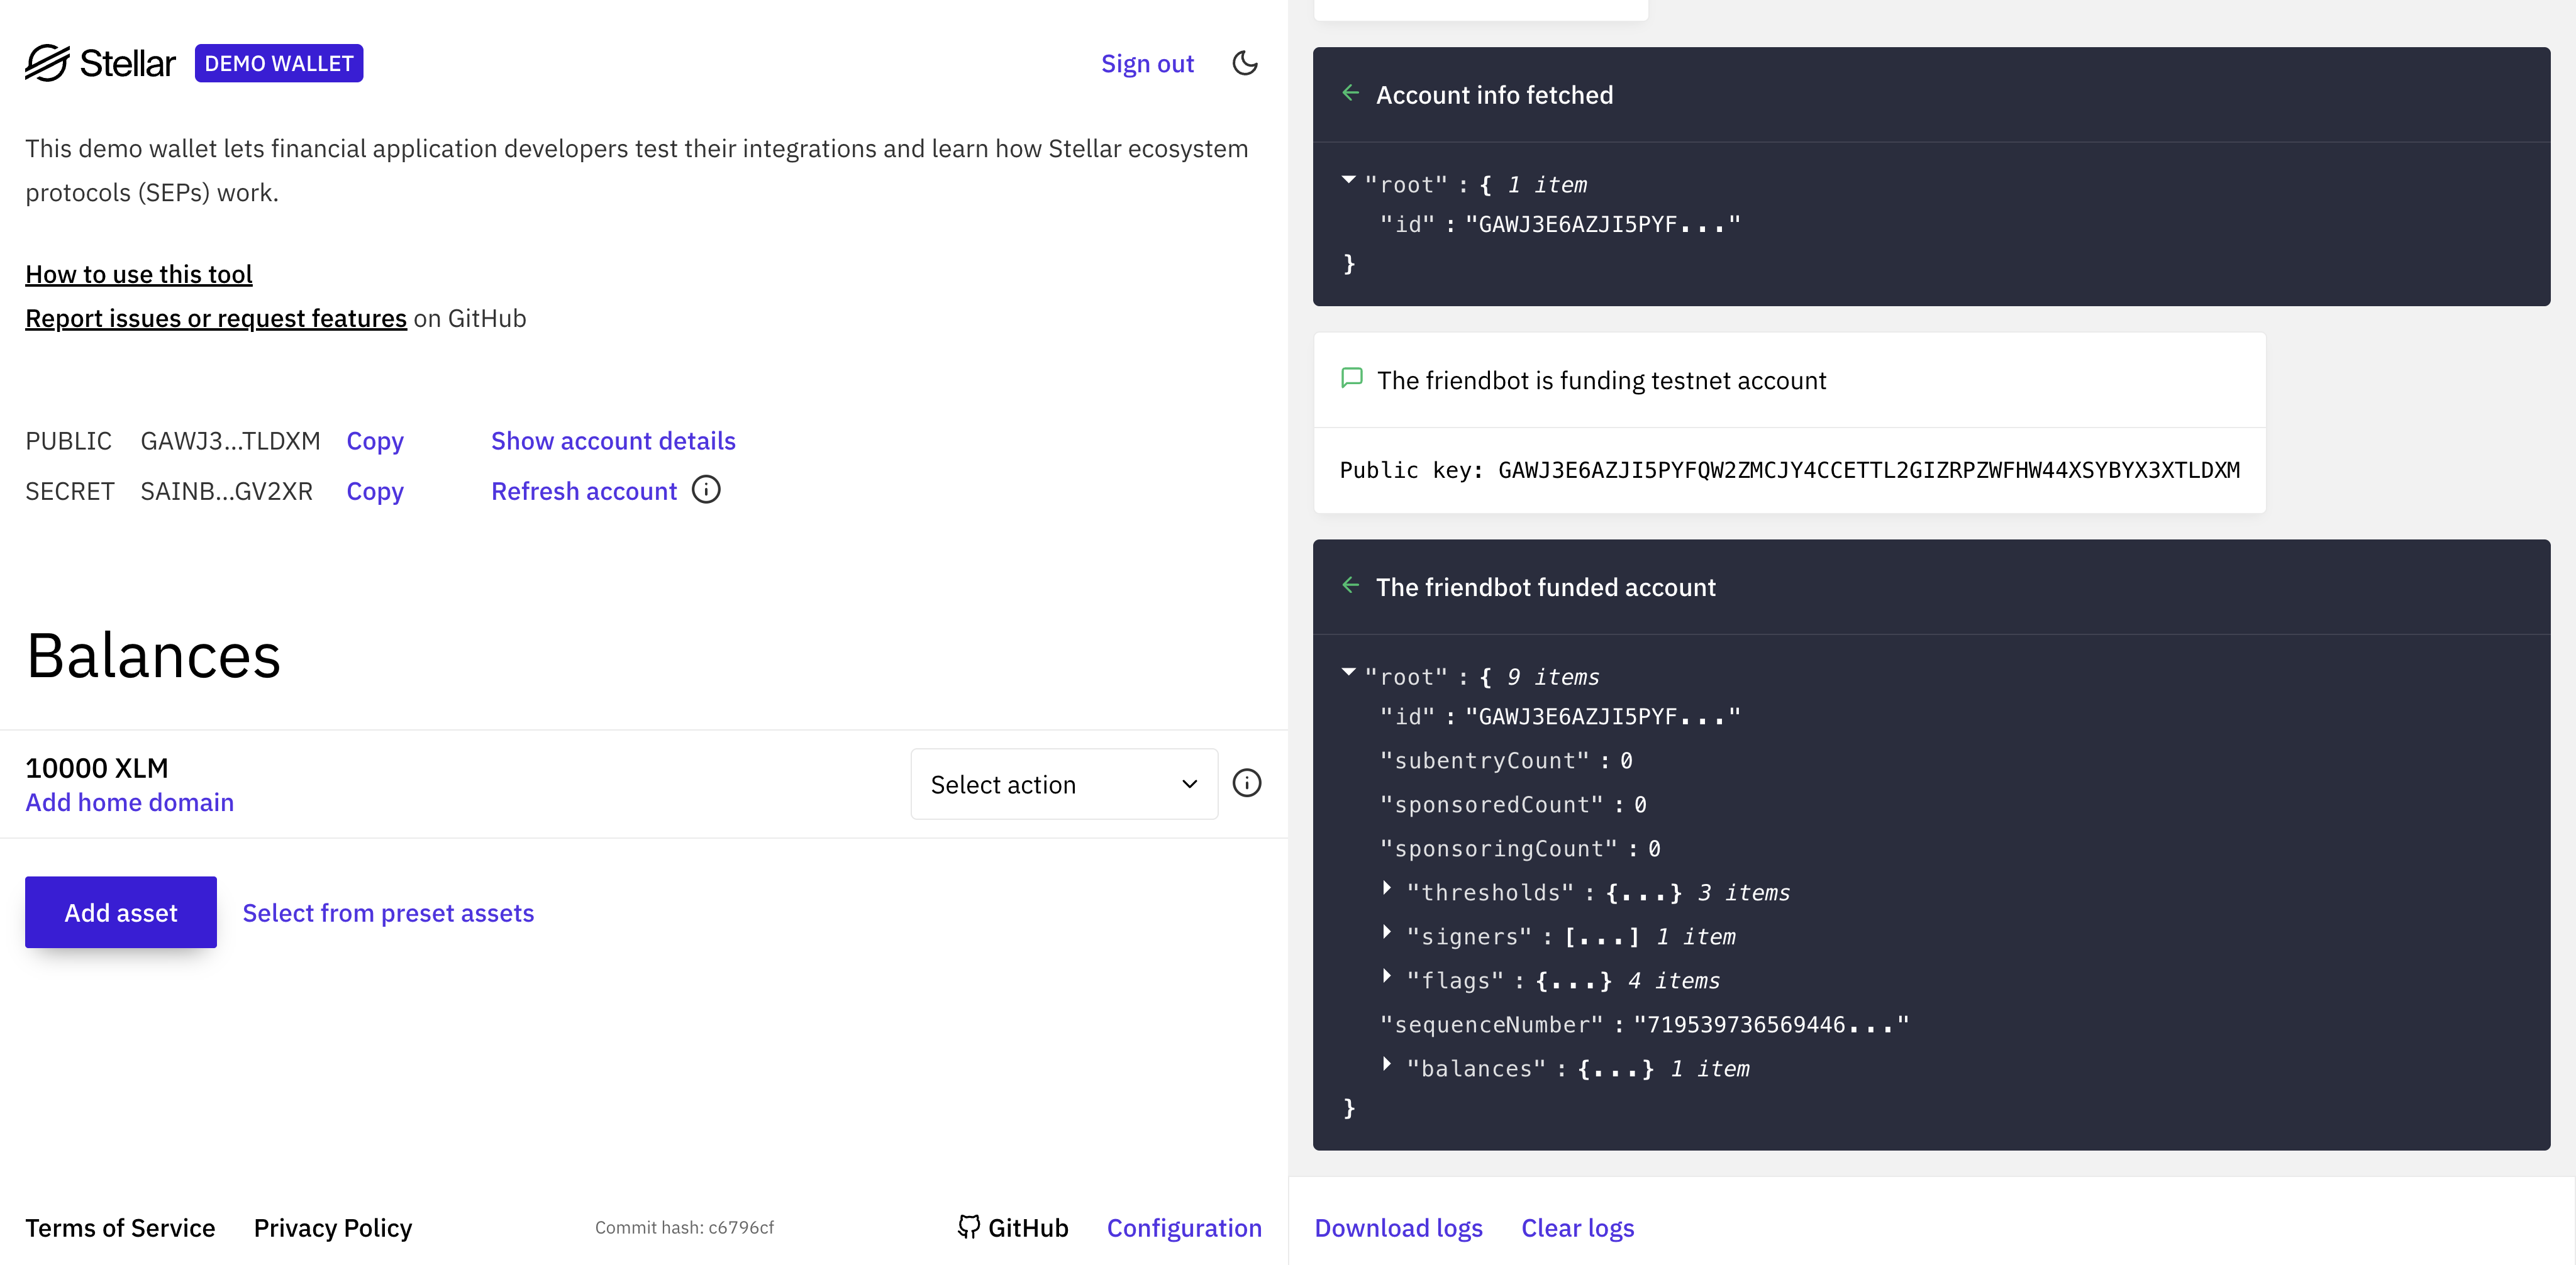
To receive your payment, initialize a SEP-24 deposit:
- Under Asset XLM, click
Add Home Domain, enterlocalhost:8000, and clickOverride. - In the
Select actiondropdown, chooseSEP-24 Deposit, then clickStart.
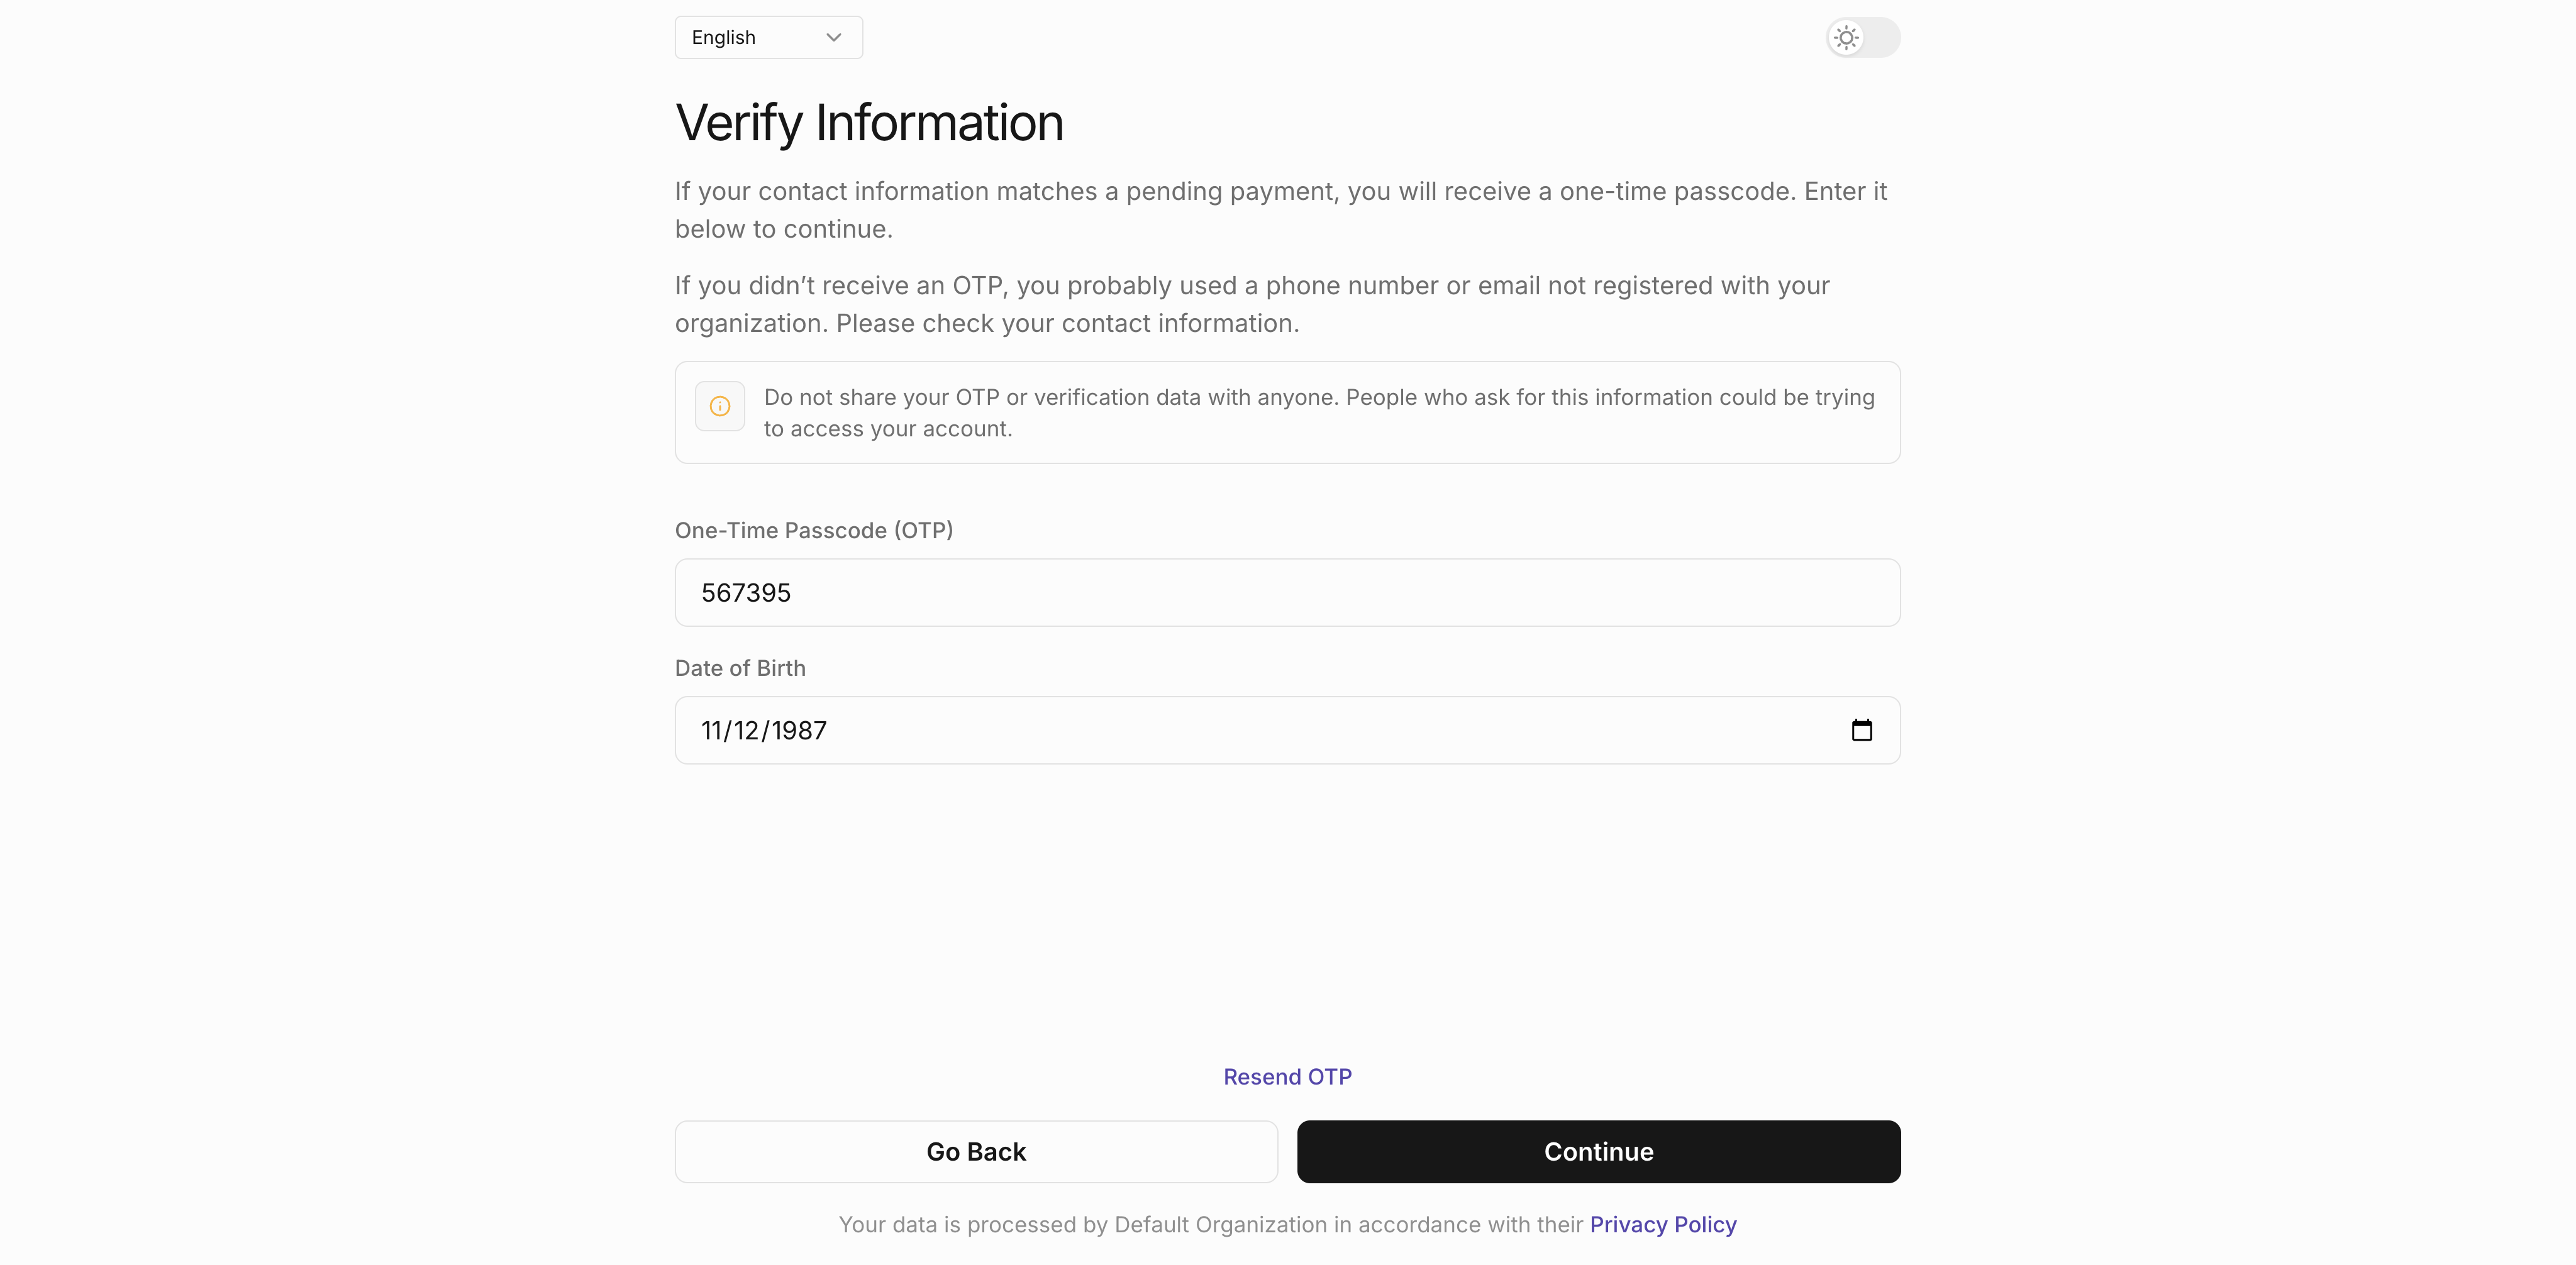
Verify your identity:
- When prompted, enter the same phone number used in the disbursement CSV.
- Complete the OTP and Date of Birth verification. The OTP appears in the
sdp-apicontainer logs (e.g., “Here is the 6-digit verification code you requested ...”).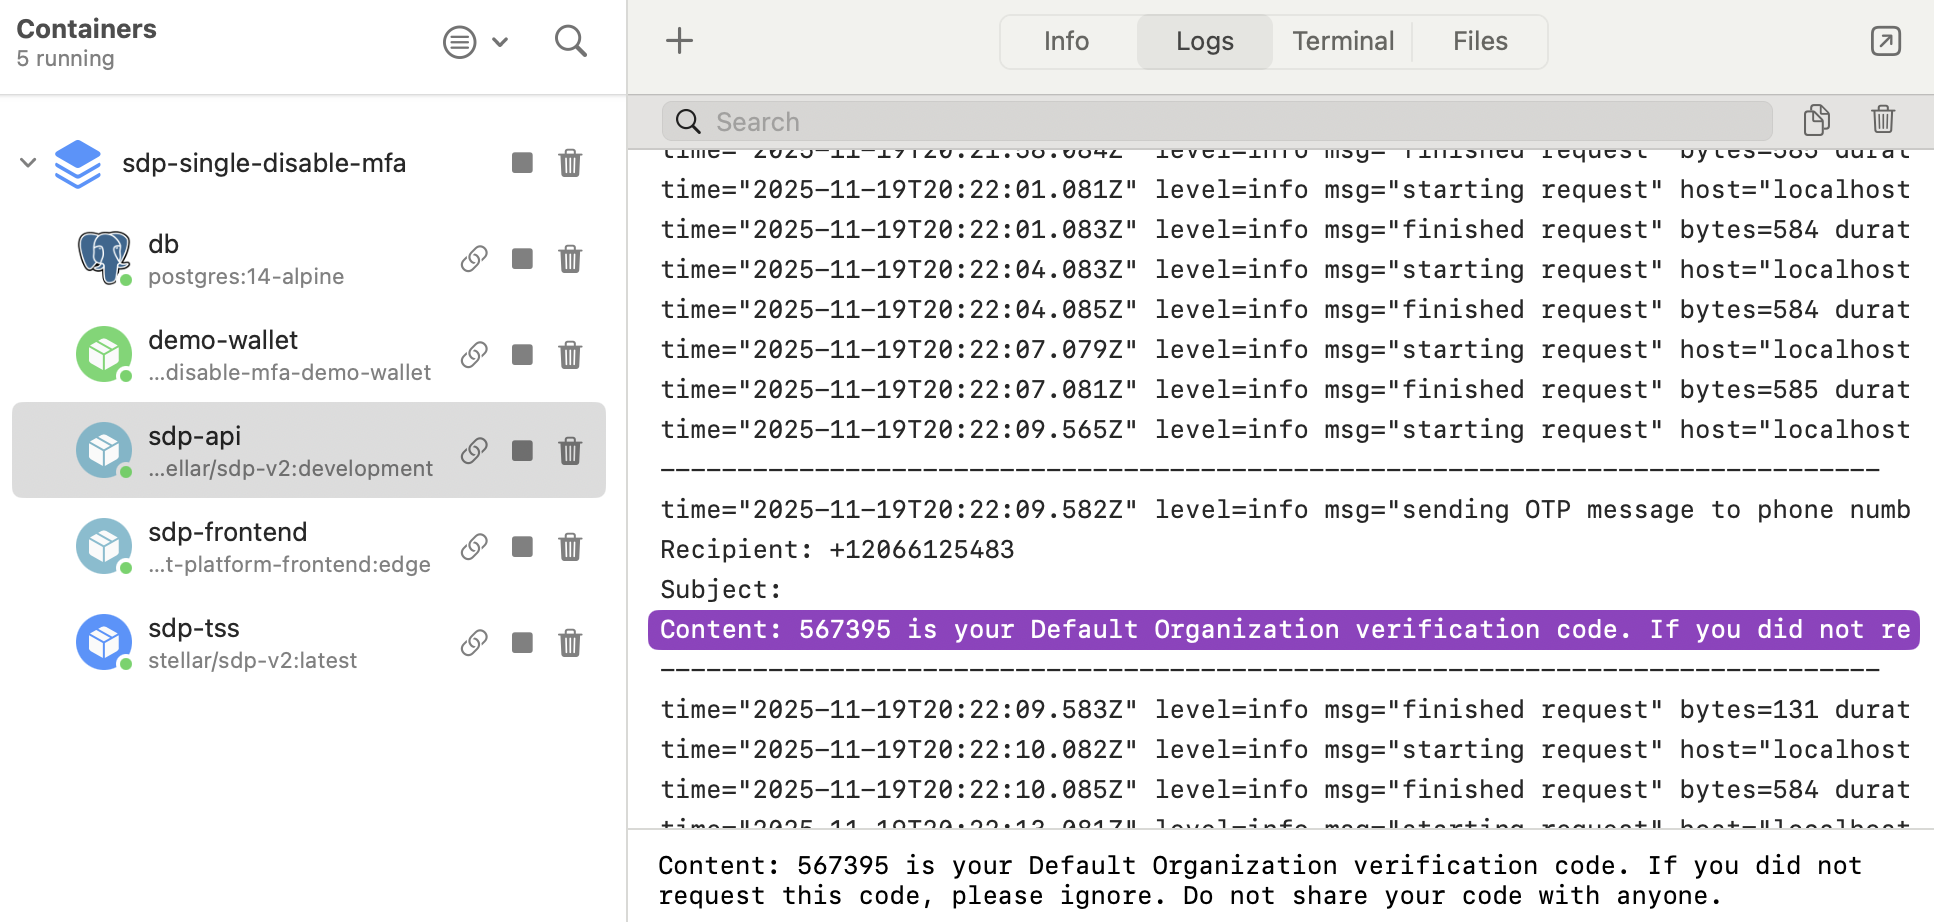
Monitoring
-
In the SDP dashboard, the payment moves from
ReadytoPENDINGduring the wallet flow, then toSuccesswhen funds are deposited.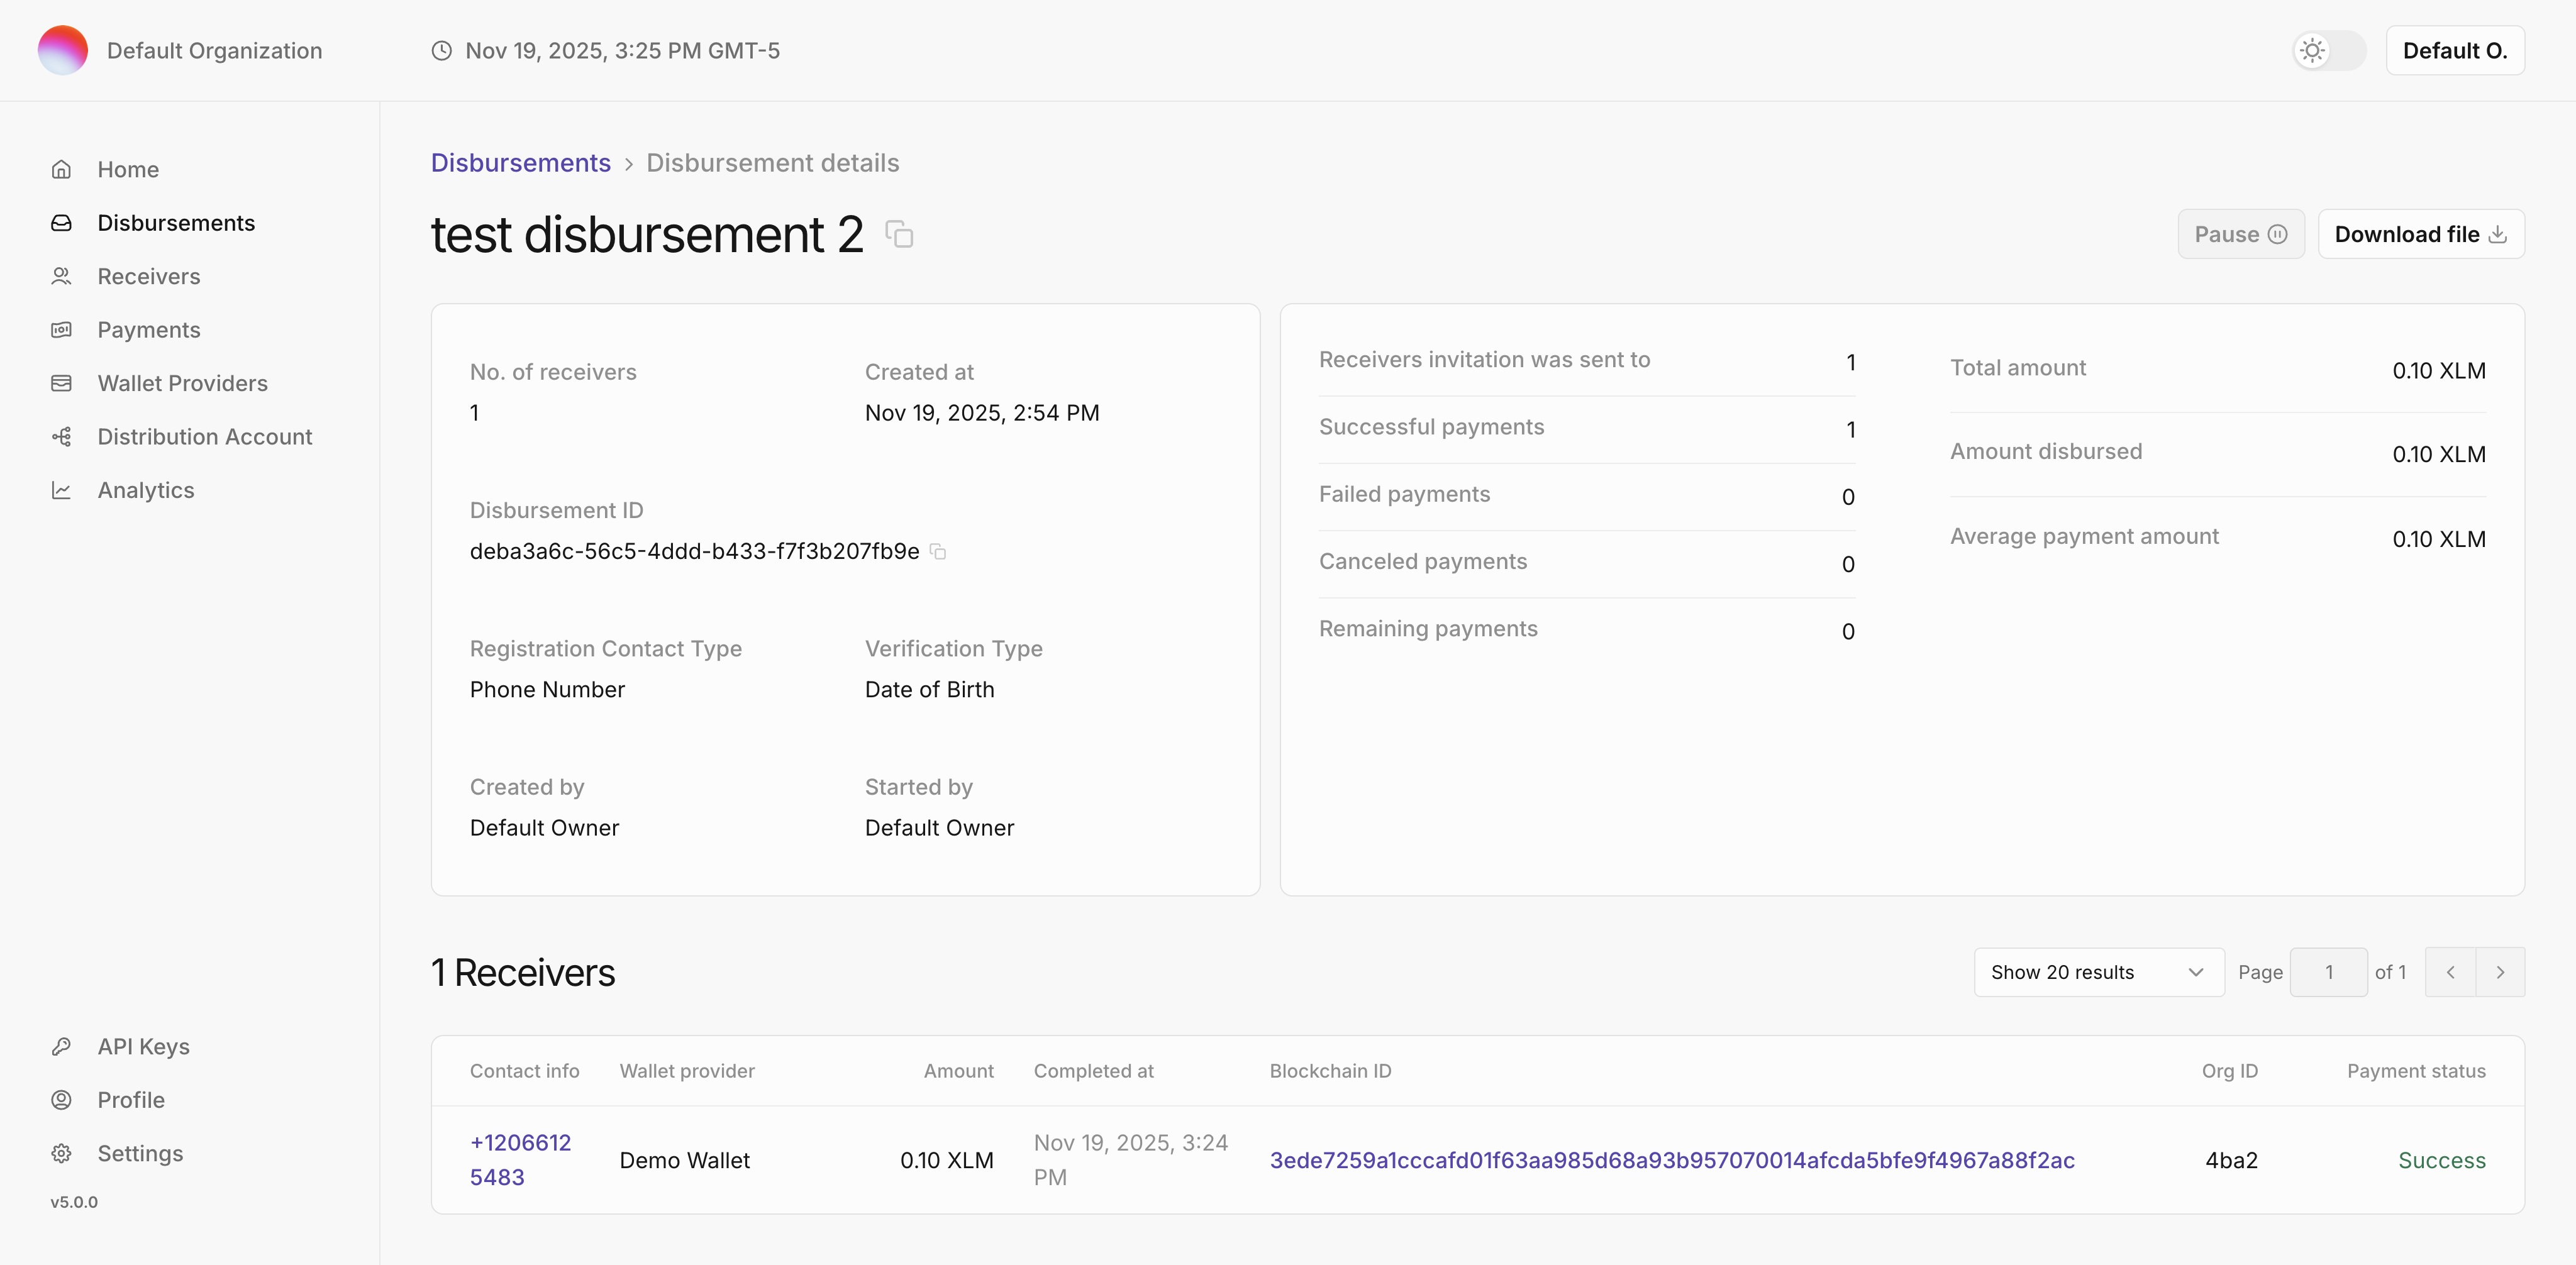
-
In the demo wallet, the balance updates to reflect the new amount.